
First of all, it’s recommended that you install the Monero CLI on Tails or the Monero GUI on a new dedicated system for Monero and other cryptos, rather than on a device that will be used for other purposes.

What is Tails?
Tails is a live operating system that allows you to use the Internet anonymously. If you plan on using Monero with an extra layer of anonymity, this is the best choice that you have available.
Tails focuses on preserving privacy and, it only offers built-in support for one crypto via the electrum-wallet Bitcoin.
There are many privacy concerned digital currency users aka many Tails users who have decided to switch their crypto from Bitcoin to Monero or other private coins. This is mostly due to the myth of Bitcoin transactions being anonymous eventually being debunked as blockchain analysis and other methods of deanonymization are currently becoming more commonplace.
Using Monero with Tails OS id really important and the primary requirement for this to happen is having an easy to use built-in wallet aka the Monero GUI.
This guide here assumes that you have Tails up and running, but anyway, for detailed information on how to use Tails, you should visit their website.
Here are the necessary steps to use Monero on Tails OS.
Booting up your Tails live OS
Boot up the Tails operating system.
Downloading the Monero GUI
- After TOR is ready, you will have to launch it from the official Monero website and click on the download tab.
- Scroll down the page and download the Linux, 64-bit GUI.
- Click on Extract Here, and this will extract your newly downloaded Monero GUI files.

Configuring your GUI to connect via the TOR network
-
- After opening the extracted Monero GUI file, right click in the black area and click on ‘Open in Terminal’. Update: Or click the .AppImage file and it will open Monero.
- Note that the blockchain will stay downloaded just make sure your directory file is always the same.
-
Click on ‘Open in Terminal’.Now, you have to enter the administration password that you created when booting up tails and hit enter. You should see a message on the screen.Replace “/YOUR/DATA/DIRECTORY” in the command with your actual data directory (Ex: /media/amnesia/ExternalDrive/bitmonero) This blockchain will be downloaded.
- Now, the Monero blockchain will start to download to the specified directory. This will take up to 48 hours, and you will also have to make sure that you have enough space on your hard drive.

To explain this easier, by following the steps presented above you have allowed for the Monerod client to connect through TOR. You also have the ability to connect to a remote node within the GUI which does not require downloading the blockchain. Anyway, for enhanced privacy, it’s recommended to download the blockchain and run the GUI as a full node.


Setting up the Monero wallet
- Now, you have to go back to the Monero folder and click on the file that’s called Monero-walllet-gui. or the file that ends in .AppImage.
- Now, you should be seeing a welcome screen appear. Here you will create your GUI wallet.
- Choose the desired language and click on Create a new wallet. Note that you will also be able to restore wallets or open them from a file if you have this data.
- Now, it’s time to name your wallet and copy and paste your seed to a secure location. You will use it if you ever lose access to your computer or GUI in order to recover your Monero.
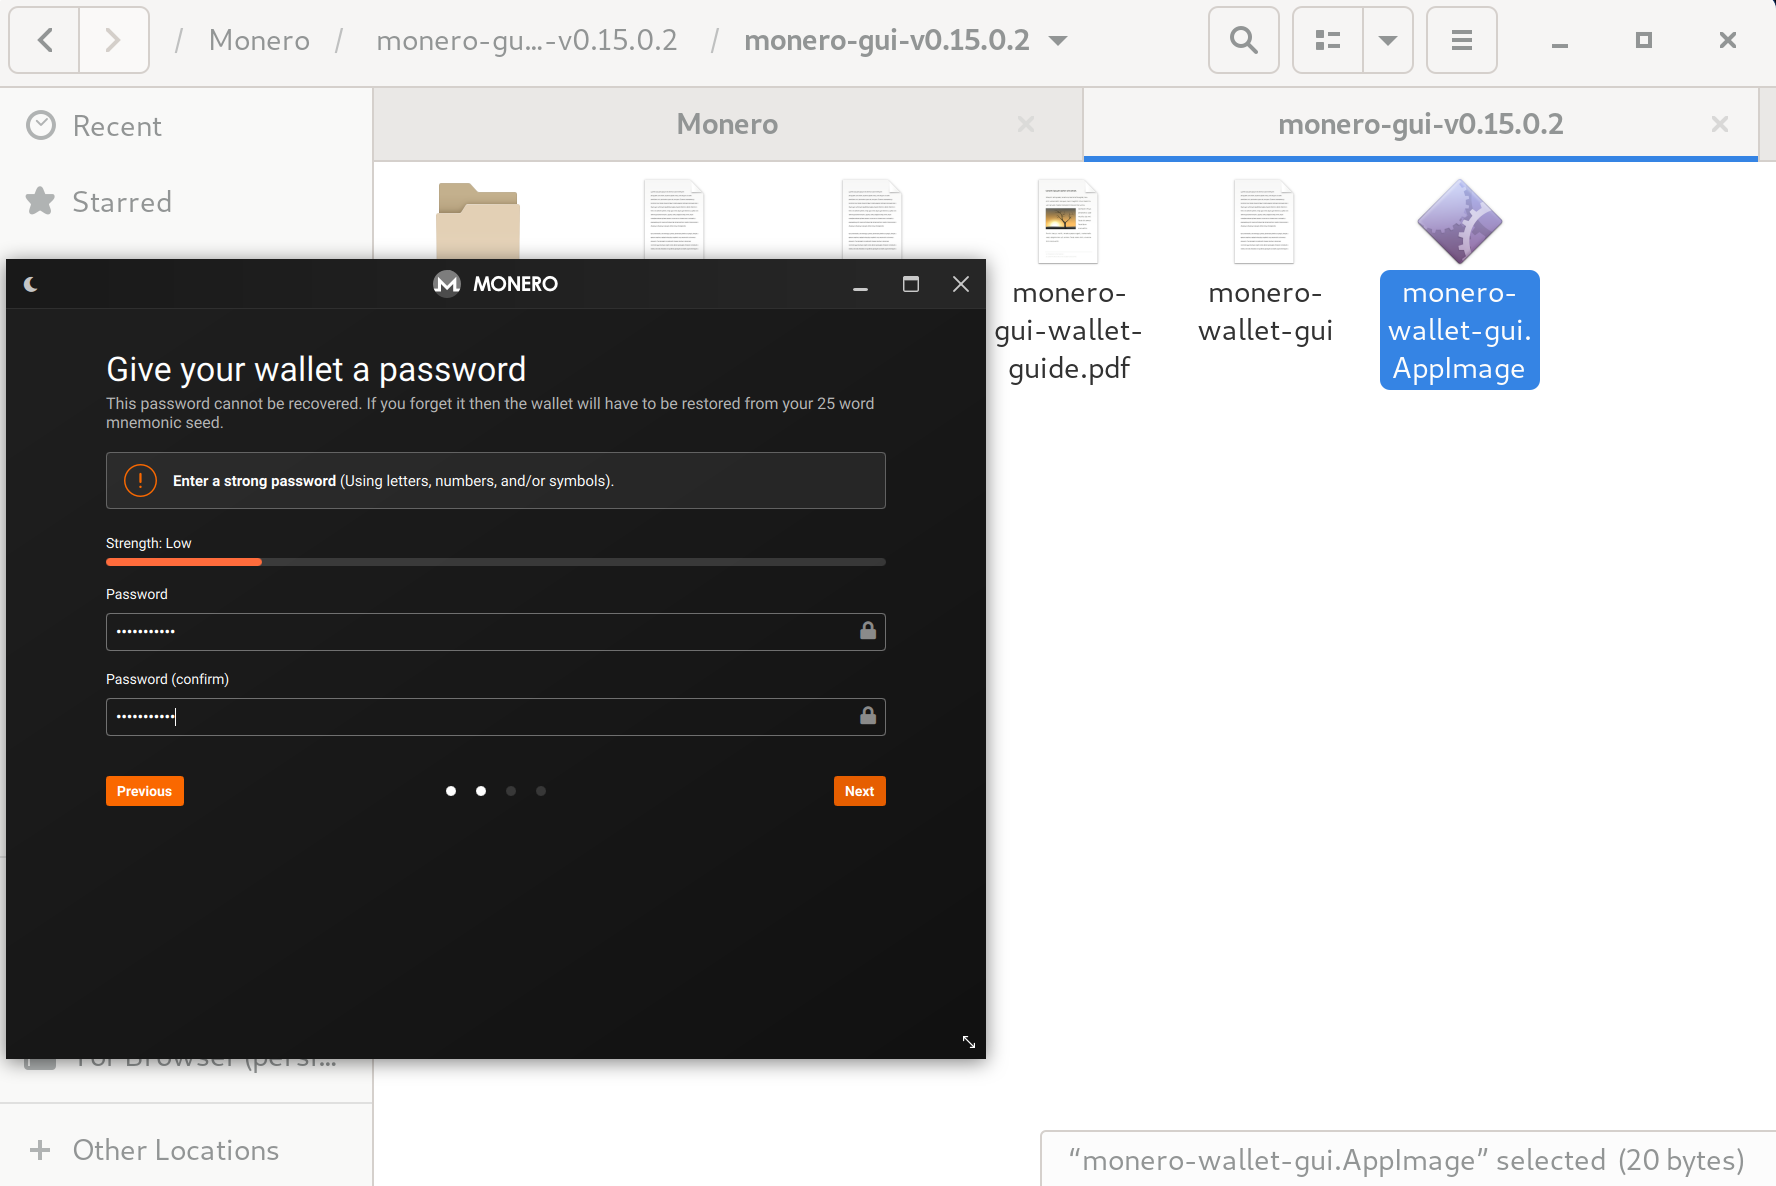
- Create a strong password for your wallet and store it in a safe place. We recommend that you use the built-in KeyPass password manager that’s built into Tails.
- Now, you are welcomed into the GUI and your new Monero wallet. While the blockchain is syncing, you will only be able to receive Monero to this wallet and you won’t have the ability to send it as well.

Connecting to a remote node
It’s really not recommended to connect to remote nodes because this can compromise your security. On the other hand, this will turn out to be a really quick way to get a wallet up and running. Connecting to a remote node will use someone else’s blockchain data to verify Monero transactions.


- First thing, click on the Settings tab.
- In the Daemon address tab, you will have to copy and paste this — cbfrpgbmlzfuj2vroprrnidjo4x7xeuhwrar4gvw2ivsvdzfmthmqbid.onion and make sure your port is 18081 (note this is a non default port). Update as of 2020/Dec the port is now 18081 you can visit http://cbfrpgbmlzfuj2vroprrnidjo4x7xeuhwrar4gvw2ivsvdzfmthmqbid.onion in your web browser to see the current port, version, and status of the TOR node.
- You should see the ‘network disconnected’ change to connected, and this means that your node is connected. Remember that it can sometimes say ‘synchronizing blocks’ but no data is being downloaded. On the other hand, the wallet is still usable when this appears.


This is all you really need to know in order to use Monero on Tails.